Showing posts with label The Cure. Show all posts

Saturday, March 3, 2012

I Have No Idea What to Call This One

This is the best name for this dish I could think of, so far. 

Hide the Sausage
1 boneless Pork Loin Roast (about 2 1/2 lbs)
4 Bratwurst Sausages
1 Onion, sliced
2 tablespoons Butter
1 bottle Cheap Beer (do NOT use a lite beer--you'll just embarrass yourself)
Salt and Pepper
2 more tablespoons Butter
2 tablespoons AP Flour
1 sheet Puff Pastry

Make the bratwurst, beer, butter and onions according to this recipe

Lay the loin fat-side down on a cutting mat.  Using a long knife, start a cut about an inch and a half from the top edge of the loin and continue cutting parallel to the cutting mat.  When you get about an inch and a half away from the edge of the loin, unfold that flap and turn the knife to slice toward the mat. When you get about an inch and a half from the next edge of the loin, continue to unfold and slice.  You ulimately want to unroll the entire loin into an inch and a half thick scroll.  Season with salt and pepper. 

In a large skillet, melt the remaining butter over medium high heat.  When completely melted, sprinkle in the flour and whisk.  Keep whisking/stirring until the roux starts to darken but before it turns a deep brown.  Remove the brats and onions from the beer bath and pour the golden liquid into the roux, whisking thouroughly and constantly.  When the sauce has thickened to a very thick gravy, remove from the heat.  Let it cool for 10 minutes. 

Spread about 1/2 of the gravy evenly in the center of the unrolled loin, stopping about one and a half inches from the edges. Lay the brats latterally 2x2 and end to end at what was the center-most part of the loin (the part that will be the center when you start re-rolling the loin).  Add the onions on top of the brats.

Roll the loin back up.  You can try tying it, but honestly, everything is going to goo out.  Instead, I wrapped the whole thing tightly in two layers of aluminum foil.  Place the package on the hot part of the grill.  Close the lid and cook for 10 minutes.  Turn the package over and cook the other side for about 8 minutes. 

The loin will now hold it's shape but the goo inside will come pouring out, so I unwrapped the top of the loin and left the bottom still sit in foil.  I moved the loin to the cool part of the grill, added cherry wood to the coals and then closed the lid to smoke for about 20 minutes. 

Bring the loin in and let it rest for 10 minutes.

Preheat the oven to 425 degrees. 

Roll the puff pastry out into a sheet large enough to wrap the loin.  Place the loin, smoke-side down on the center of the pastry and wrap it up, sealing the seam on the bottom.  Trim away the excess dough from the ends.  Flip the package over and lay it in the center of a parchment paper-lined cookie sheet.  Poke a lot of little holes in the top of the pastry to let the steam out and pop it into the oven. 

Cook for 15 minutes or until the crust is golden brown.  The interior temperature will read about 170 degrees.  Let rest for 10 minutes.  Slice and serve!

I know the name implied a post more hilarious.  Sorry to let you down. 

Penis. 

Does that make up for it?

Sunday, December 19, 2010

Wrapping Presents

My brother's birthday was early this month (Happy Birthday, My Brother!) and to help him with the celebration, we went to his house and made dinner.  (I like it when someone else gets to clean up the house.  Happy Birthday, My Brother!) I stuffed some pork rib chops with Parmesan cheese, dates, wild mushrooms and sage, and that got me thinking of our inclination of stuffing one food into another.  The whole concept is glorious: take a good food and then stuff it full of more good food to make one super food.  That is gluttony at its most crapulent!  (And yes, that's a word.  Look it up.) 

It's also delicious, and we who consume food nearly demand it.  At restaurants, Stuffed Crab or Stuffed Lobster grace the menu of almost every seafood establishment.  We like to dress up baked potatoes as Twice Baked Potatoes.  Chicken Kiev, Chicken Cordon Bleu, Roulades, and Baked Alaska all fulfill our need to enhance the dining experience by putting more food into the food we started with. 

Turducken.  Need I say more?

So how can you create a new dish by stuffing one food into another?  What do you need to look for?

First, of course, begin with flavors.  Find compliments.  Sweet and sour are a safe start for any savory dish, while acidic flavors are also good at cutting through heavy fats.  But find a way to surprise the audience.  Wrap bacon around a kumquat and use that combination to throw a culinary curve ball.  Now stuff it into a Cornish Game Hens for roasting!  Sweet, savory, rich, lightly acidic. . .  Mmmmm!  I'm making me hungry!

Next, think of the physics involved.  How can you get enough space open to get the goodness in?  A yin for the yang, if you will.  You also want to figure out how to keep it in place.  Remember that, when heated, some things expand and take up more volume.  Also, when heated to sufficient temperatures, proteins contract and tighten their bonds making them both less elastic, as well as smaller.  That juxtaposition nearly guarantees to squeeze out whatever stuffing you're attempting to stuff--unless preparations have been made.  Fowl is easy: a natural cavity and supporting bone structure help.  Whole fish is similarly easy.  Mushrooms, potatoes and zucchini all work well.  Steak, pork chops and chicken breasts will put up a fight.  Employ butcher's twine, skewers or a crust or wrapper to help (think: puff pastry).

For those who haven't tried it before, here's a couple of recipes to get you started in the right direction.

Stuffed Mushrooms
8 large Button Mushrooms, whole, blemish free and firm
1 small Shallot (or Onion) minced, about 1 1/2 tablespoons
2 strips Bacon, chopped fine
2 teaspoons Bread Crumbs
Salt and Pepper, to taste
Cheese (I prefer sharp cheddar or pungent asiago, although Parmesan works well, too) sliced into little squares to cover the mushrooms

Preheat oven to 325 degrees.

In a medium skillet on medium high heat, saute the bacon until crispy.  While cooking the bacon, clean the mushrooms, gently remove and chop the stems, leaving the the rest of the mushroom whole.  When the bacon is about ready, add in the shallot and mushroom stems, salt and pepper.  Saute until the shallots and mushroom stems are soft.  Add the breadcrumbs, stir and remove from the heat. 

Scoop the filling from the pan into the mushroom tops and place them onto a greased cookie sheet.  Lay the slices of cheese over the top and pop them into the oven for 15 minutes or until the cheese is melted. 

Be careful when eating.  These bad boys can stay hot for a while!


Chicken Roulade
4 large, boneless Chicken Breasts
1/4 cup soft Cream Cheese
1 teaspoon dried Sage
1 teaspoon Thyme
2 teaspoons Parsley
1 teaspoon Lemon Zest
Salt and Pepper
Plastic Wrap
The secret to this dish is making it far enough in advance to let it chill firmly before cooking it.

Lay a chicken breast between 2 pieces of plastic wrap.  Using a flat meat tenderizer (I use a large rubber mallet) gently pound out the breast until it is evenly flattened to about 1/4 to 3/8 of an inch.  Repeat for all four. 

Lay 2 flattened breasts on a fresh piece of plastic wrap, overlapping each other slightly.  Sprinkle with salt and pepper, then spread 1/2 of the cream cheese evenly over the chicken.  (DO NOT use a contaminated knife or spoon to scoop another helping of cream cheese out of a container.  That's how you get sick!  And my mom would have a fit!) 

In a small bowl, combine the sage, thyme, parsley and lemon zest.  Mix to combine.  Sprinkle 1/2 of the mixture onto the cream cheese. 

Using the plastic wrap to help you, roll the chicken into a tight pinwheel log.  Be sure to not roll the plastic into the pinwheel.  Wrap the log tightly in plastic and refridgerate for 8 hours.  Repeat with the other 2 breasts.

I prefer to cook the chicken on the stove top.  While still cold, remove from the plastic wrap and lay the roulades into a hot greased skillet.  Brown on each side, using tongs to turn it over.  Reduce the heat to low, cover and let cook 5-10 minutes more, or until the center reaches 160 degrees on an instant thermometer.  Cover and let stand for 10 minutes.

Sunday, November 14, 2010

The Circle of Life, and All That

This was a meat-inspired week.  And I want to bring honor back to the word "butcher." 

Since returning from our rather unsuccessful hunting trip (*gasp!*  We'll have to buy our own red meat this year.  Read on for a plan), I've been running into meats of all sorts in all sorts of places. 

I've often said that if I wasn't a financial advisor, I would want to be a butcher.  For some, this is the most horrible thing in the world.  Akin to murder.  I challenge that line of thinking on an evolutionary basis.  Consider for the moment the human mouth.  Our tongue not only seeks out those things that provide a wide range of nutritional benefit, but our teeth and jaw alignment is perfectly suited to grind up a wide range of foods.  We have evidence of our earliest ancestors hunting and butchering animals at the dawn of the Stone Age, about 2.5 million years ago.  At that time, our teeth and jaws were much more like a chimpanzee's--sharper, pointed teeth up front, molars in the back in a longer narrower jaw hinged deeply in the skull and attached to massive jaw muscles.  Our palates have grown wider and shorter, and while some evolutionary theorists believe that forks, knives and cooking have made us weaker, I like to think of us as more refined.  We still have sharper, tearing teeth placed up front so that we can remove large bites, and broad molars for grinding and mashing.  Even our saliva is attuned to pre-digesting the essential proteins found in meat. 

But there is more than evolution at play in my admiration of butchery.  In much the same way Da Vinci explored the human figure examining musculature beneath the skin, a butcher knows his or her way around a carcass and creates an artform of separating different masses of muscle from bone.

The Denver Contemporary Art Museum hosted a a week-long art project called Art Meets Beast. Among other elements and events, Jimmy "The Butcher" Cross dissected a half a bison in roughly 2 hours. To put this feat of mastery into perspective, my Dad and I (who have a collective 80 years of experience in butchering our own meat) take 4 hours to butcher a deer, which is about half the mass of half-a-bison. Jimmy's knife (a 6 inch Boner) danced in and out and between bones like Gene Kelly weaving around light poles and umbrellas.  (By the way--there was SUPPOSED to be the music of Buffalo Springfield on the flugelhorn.  I heard no Buffalo Springfield and no flugelhorn.  Roger Green played "Home on the Range" on electric guitar as background music for the butchering workshop, however.)  Peter Marczyk of Marczyk Fine Foods (where Jimmy performs his craft) provided running commentary during the demonstration and expounded on the nature of bison, the butchering process and artform, the rise of American interest in knowing where our food comes from, and the lament that all too often, demand for particular cuts of meat (tenderloin, rib eyes, etc.) drive the price up for a whole animal and changes the marketability of beef, pork and bison in general.   I plan to buy a whole bison to split with my Dad in lieu of the elk we didn't get. 

This week, I also took the time to swing by and see my friends at Il Mondo Vecchio.  Walking through the doors on Loading Dock Friday, continues to bring a smile to my face.  The inviting fragrance of spices and curing meat promise a reward for the palate as well.  And certainly, I'm always excited to hear what's new and upcoming, and exchange recipe ideas.  Gennaro, dressed handsomely and incongruously in a dark suit and a tie, greeted us at the door and showed us around the facility.  He walked us through the curing process and then introduced the samples layed out for us to try.   Hot Coppa, Longanzia, Cured Duck, Beef Bresaola, Vino e Pepe Nero.  I picked up a half pound of Bresaola for my friend and a little of my favorite pork product, and a half pound of Duck Lardo.  On the way out Mark DiNittis was coming back into the shop. We discussed recipes, meats, and love of the craft.  He also let drop that he's going to be featured in a new book, Primal Cuts: Cooking with America's Best Butchers.  The dude is a rockstar. 

I took the Bresaola to Highland Tap and Burger and my buddy Eli, the executive chef there.  He creates a fusion of beer and meat products.  He'll sample the Bresaola in the cheese platter with homemade mostardo and a whole-grain ale mustard.  The nice guy gave me beer for the trouble.  And next week I'll introduce him personally to Il Mondo Vecchio.

If you're not already a committed vegetarian, I applaud you. You know the joys of well prepared meats and the majesty inherent in the noble beast.   If you are a vegetarian, I applaud you too.  You get a golf clap.  Way to stay committed to your principles.

Tonight for dinner:

Awesome Osso Buco
Instead of shanks, you can also use neck bones, tail bones or other less favorable cuts of meat.  Good Osso Buco is about the deep meaty flavor.
1/4 cup Vegetable Oil
2-4 Beef Shanks (about 3 pounds)
2-4 Lamb Shanks (about 1 pound)
Kosher Salt
1 medium Onion, chopped
2 medium Carrots, peeled and chopped
1 stalk Celery, chopped
1 tablespoon Tomato Paste
1 cup good Dry Red Wine
2 1/2 cups Vegetable Broth (or Chicken or Beef)
1 sprig Rosemary
3-4 sprigs Thyme
1 Bay Leaf
4 whole Cloves
12 whole Black Peppercorns

For a prettier presentation, use butcher's twine to tie the meat onto the bone.  Lightly and evenly sprinkle salt on the shanks.  Let stand on end to dry.

 In a large dutch oven (cast iron is great) heat the oil until smoking and lay in the shanks.  Brown them on all sides.  Reduce the heat to medium high and add the onion, celery and carrots.  Sprinkle on the 1 teaspoon of the salt.  Stir until the onion begins to turn translucent and then add the wine and tomato paste.  Stir gently until the paste dissolves.  Add the broth (I prefer vegetable because it's not as heavy and over powering).  Place the rosemary, thyme, cloves, black peppercorns, and bay leaf in a satchel of cheesecloth.  Add to the broth. 

Cover and let come to a boil.  Reduce the heat and let simmer for 1 1/2 hours.  Check now and then, making sure the liquid isn't boiling off too quickly.  add more broth if needed.  Using tongs, gently turn the shanks making sure that each part gets the liquid love it deserves. 

Remove the shanks to serving platter.  Discard the cheesecloth.  Ladle on the broth and vegetables.  Add fresh thyme and rosemary as a garnish.  Serve with crusty artisan bread. 

Wednesday, September 8, 2010

The DLT

Too many people mentioned that I didn't include a recipe last time in the last post.  So here's a simple one.

The DLT

6 slices Cured Duck Breast, pan fried until it's lightly crispy 
2 slices of your favorite Bread, toasted and buttered (optional, but I prefer it)
1 leaf Bib Lettuce
3 slices Tomato
1 tablespoon Plum Mayo (which is 2 tablespoons Mayonnaise and 1 teaspoon Asian Plum Sauce, whipped together with a fork)
Salt and Pepper to taste

Make a BLT, but use the duck. 

Sunday, September 5, 2010

Is That A Salume In Your Pocket, Or Are You Just Happy To Be Here?

They say the best things in life are free.  Walking hand-in-hand through a park with the one you love.  Reading a book.  (I finished the Twilight series upon the request of someone who will remain nameless.  And yes, she was a woman.  And yes, I sort of enjoyed them.)  And another of my favorites: new discoveries.

Think back to Bacon-Fest 2010 and in our (my) educational segment, we (I) discussed (told you about) the "cure" that makes bacon, bacon.  But curing meats takes time and space that most people do not have in abundance.  If only there were a place that the average Joe and Jane could go to acquire a broad spectrum of cured meats.  My friends, I have discovered the Shangrila of cured meats, right here in Denver!  Il Mondo Vecchio (essentially, "The Old World," the name indicates their sense of commitment to their craft) resides in an industrial zone of on the outskirts of Denver's downtown.  Located behind a blue collar diner and blue collar topless bar (think blue collar industrial strippers and you'll know what I mean) the humble surroundings belie the grandeur of the product inside. 

First, a little examination of salumi, and charcuterie.  Charcuterie is the general term for any kind of cured meat (although most reference pork), curing through any combination of salt, spices, processing, heating and drying.  Bacon, salami, pâté and sausage are all examples.  Salumi is the Italian representation of charcuterie.

Meats were first cured and dried to eliminate the possibility of bacteria and other beasties from eating, breeding and ultimately spoiling the food.  Without as much moisture, and with the addition of spices and salt, some cured meats can be kept near room temperature for many years.  Now we have refrigeration, so we don't need to cure meats the way we once did.  We still love the flavors and textures, however, so salame, coppa, prosciutto all remain on our menus.  Curiously, although we want to stop meat from spoiling, many of the best meats are actually fermented before they are cured.  Hhmmm.  Interesting. 

Jason Molinari has a good blog on curing meats.  Several others discuss the various types and flavors.  Start your education anywhere, but start your exploration in your mouth.  Take advantage of Mondo's Loading Dock Fridays.  Every Friday, from 2:30(-ish) to 6:30(-ish) they provide tastings and tours.  And every other Friday, my new buddy Joe Beggs can be found serving up smoked meats in slider form.  If you're in the neighborhood, stop by.  If you're not (and you're probably not), make a special trip--you'll be happy you did!

This morning's Breakfast Rustica includes Sweet Coppa, Prosciutto, Cured Duck ("raw," as well as cooked like bacon), fresh sliced peaches and sourdough toast with our friend's Raspberry Jam.  (Thanks Stephanie!!)

Sunday, August 8, 2010

Grills of Summer

Our caveman ancestors had nothing on us.  Oh sure, they created some pretty cool art, they invented tools at an alarming rate, they could defend themselves against oversized beasties, and they started astronomy and agriculture.  Heck, they practically invented "roughing it" while camping out under the stars or seeking refuge in tiny caves, but they didn't have marshmallows.  Nothing compares to finishing a hard day of relaxing in the wilds of Colorado like sitting around the campfire and eating fire-roasted marshmallows off of a stick.

And that got me thinking, "fire cook food good."  (Something about fire makes me speak like a cartoon caveman.  Please bear with me.)  As a continuation of Boys and Grills, I offer another handful of recipes that perfectly celebrate summer evenings, rituals as old as time, good friends and the opportunity to play with matches. 

Corn on the Cob
When buying ripe corn still in the husk, don't be afraid to peel the husks and silk back to look at the kernels.  You want big, fat, juicy kernels that aren't damaged by bugs or mold.  Resist the temptation to completely shuck the corn, though.

When you get the corn home, gently peel the green outer husks and the yellow-white inner husks all the way back (but not off!) exposing the corn silk.  Completely remove the corn silk.  Gently, but firmly recover the corn with the husks, completely covering ALL of the kernels.  Tie the ends of the husks with some butchers twine if they don't want to stay closed.  (If the outer husks are overly dry and brittle, soak the ears in a bucket of cool water for 5 minutes.)

When the coals of your fire (or grill) are hot and ready and no longer throwing flames, lay the ears up against the outside edges of the coals.  Cook for 5 minutes on a side--the outer husks should start to blacken after 3-4 min.  If they blacken too fast, scoot the corn back from the heat an inch or two.  Take your time with this one.  Don't rush.  When they are evenly cooked, remove and lay on a platter to cool for a couple of minutes before peeling.  Serve with whipped, herbed butter.

Potato Pockets
This has nearly the same dry heat/steaming cooking technique as the corn on the cob, but we use tinfoil instead of corn husks. 

1 large Russet Potato per person
1 large Onion
2 tablespoons fresh Rosemary
3 tablespoons Butter
Salt & Pepper (Lowry's Seasoned Salt is pretty darn good, too)

Wash potatoes, and slice into 1/4 inch rounds.  (You can use whatever potato you like, but I like the starchiness of the Russets.)  Slice the onions into 1/2 rings.

Lay out a long sheet of heavy duty aluminum foil (if you're British you just said that weird. Ha Ha!) and grease it down by rubbing a teaspoon of butter all over it.  (Start in the middle and work outward, stopping an inch or so from the edges.)  Layer the potatoes and onion and seasonings over the foil.  This should make about 2 layers.  Grease up another sheet of aluminum foil.  Add the remaining butter over the potatoes and onions. Cover with the foil and crimp the edges well shut.

I like to double wrap the foil, so I usually repeat the pocketing without greasing this layer.  This helps insulate against burning and tearing.

Throw the pocket into the hot coals.  Cook for 15 minutes, then flip over and cook for another 5. Serve hot!

Wisconsin Bratwurst
There is WAY too much misinformation and just plain bad cooking out there when it comes to Brats.  This is easy and delicious. 

[Johnsonville] Original Bratwurst (Johnsonville is the original American Bratwurst, but other companies make a good brat.  But so help me, God, if I hear that you're using the cheese filled, or spicy, or some other abomination of brats, I will personally come over and take away your Good Taste card.  Stop it.  Do it right or don't do it at all.)
2 tablespoons Butter for the pan, plus more for the buns
1 large Onion, sliced into 1/2 rings
1 can of Cheap Beer (break out the PBR!)
Kaiser Rolls (yes the round ones.  It's weird, but it's right--I'll explain later)
Sauerkraut (optional)

While the coals of the grill are heating up, soak the brats in an icewater bath. This tightens the skins.

Sautee the onions in the butter in a medium sized sauce pan until they are translucent.  Pour in the beer.  Bring to a simmer, but DO NOT boil.

When the coals are ashed over, lay the brats on the hottest part of the grill, 1/2 inch apart.  Cook for 5 min, or until they start to char.  WHEN you have a flare up--and you will, move the brat off the flames and close the lid.  DO NOT stab at your brats with a fork, but rather move them with your BBQ tongs. Rotate and flip them over.  Get them slightly blackened on all sides.  When they are well cooked, lay them in the beer and onion bath.  Keep them on the stove until the buns are ready.

Slice open and butter the inside of your kaiser rolls. Kaisers are best because they have a good crusty outside and round shape that is much larger than the brat it's going to hold. It can stand up to all the juicy goodness and sloppiness that's about to take place without spilling it's contents all over your lap and disintegrating into goo.  Place the rolls, butter-side down on the grill and toast until they get golden brown in the middle and darkened at the edges.  Assemble your brats with one--or if you're daring, two--brats in a bun, mustard and/or ketchup, sauerkraut, and onions.That's it.

Some common bratwurst mistakes: 
1) Soaking the brats in beer first.  This does nothing but waste a cheap beer.  It adds nothing to the flavor (it burns off) and can make an already smokey grill a flaming grill.  Not helpful.

2) Over garnish.  Brats are a joy to themselves: simple, harmonious.  Don't add things like mayo or pickle relish.  Have a side of potato salad and a pickle if you need these things.

3) Ignor the warm bath afterwards.  Brats and beer are meant for each other.  The warm beer, butter and onions infuses the sausage with extra deliciousness.  But if you must sin, this is one you may pass on.


Grill-smoked Crab Legs

These are awesome and simple. 

1 lb Snow Crab Legs, per person (here in Colorado, usually sold pre-cooked and then frozen)

Build a two-layer fire in your grill.  When the coals have ashed over, add a layer of cherrywood branches or chips on top of the coals.  Stack the crab legs on the cool part of the grill and close the lid.  The smoke will be pouring out of the grill so sit up wind.

Let these continue to cook until the smoke has nearly subsided, about 30-45 minutes.

Serve with melted butter and or lemon if you want to.  But we mostly ate them plain!

For dessert, go ahead: grill some marshmallows on a stick. 

Sunday, April 25, 2010

The Road of Excess Leads to the Palace of Wisdom

Certain moments in humanity's passage on this earth have demanded extremity.  We have the Pyramids of Giza, the Burj Khalifa, and the Hummer.  Artist, poet and Christian mystic William Blake recognized this most human of conditions when he wrote the words to today's blog title (okay--he didn't write it for my blog, I just borrowed it), and Susan Sarandon made it memorable to many in a context of sex and baseball.   I think it's a good opening to express the extremity of our next attack on cuisine, for today the world will know what it is to have too much bacon.  Can we eat 6 bacon dishes and NOT be nauseous.  Can we even enjoy it?  I love a challenge.

First we have to decide on what kind of bacon to explore.  By definition, bacon is the salt-cured fatty meat of our porcine friends.  It may be smoked or not.  If smoked, it may be ready to eat.  Therefore, Turkey Bacon, while also unpleasant, does not qualify for bacon.  Canadian Bacon may be back bacon, but more often is simply cured and processed ham.  (As a side note, when you move to Toronto, and you get there late, and you need to eat, but it's too late and you're too tired to go out for dinner so you want to order a pizza and you really like Canadian bacon and pineapple, do NOT order Canadian bacon.  They call it ham.  Curiously, however, when asking for bacon, Canadians ask for American-style bacon.  Silly Canadians.)  I've also heard of lamb bacon.  Intriguing, but still not technically bacon.  I'm staying American and with pork for today's experiment.

Bacon Steak
Back Bacon
Belly Bacon
Bacon Jam  Yes, that's right, I said Bacon Jam.  My sister in law thought I needed Bacon Jam.  I didn't know I did.  You can find out more here.

I went to my favorite little neighborhood butcher shop to examine the possibilities. Wally's Quality Meats and Delicatessen.  Great guys who know their meat products and take pride in presenting the best.  They are always happy to take the time to answer questions and give good advice.  Yes, it is usually (but not always) more expensive than King Soopers, but it's worth it.  Try them out and let me know what you think. 

I asked them to give me the differences and show me their selection of bacon.  Belly bacon is higher in layered fat.  Back bacon is considerably leaner.  A bacon steak (or what I'm calling bacon steak) is simply a bacon slab from the belly of a pig left uncut.  You can ALWAYS ask your local butcher to cut your bacon to order.  Thinner cuts will cook up crispier.

In the morning aftermath of our bacon foray I can happily report that we are all still alive, and perhaps more importantly, that we all still love bacon.  Each dish was perfect in its own way.

The evening's dinner (and thank you to our friends for providing wine, a WONDERFUL potato cassarole, and delicious brownies and ice cream):

Bacon Barley Soup
3/4 cup uncooked, chopped Bacon
1 Leek, greens removed, chopped
1 medium Parsnip, peeled, chopped (about 1/2 cup)
1 small Rutabaga, peeled, chopped (about 1/2 cup)
6 cups unsalted Vegetable Broth (homemade, use the greens from the leaks and the ends of the root veggies, if you like)
1/2 cup Barley, uncooked
Salt and Pepper, to taste

In a large saucepan, brown the bacon on medium high heat, until most of the fat has been rendered.  Drain the fat, reserving 1 tablespoon.  Add the leak and continue to stir until it starts to turn translucent.  Add the remaining vegetables and saute, adding the reserved bacon fat as needed.  Stir and cook for about 5 minutes.  Pour in the broth and let come to a slow boil.  Reduce the heat and let simmer until the veggies have softened but are still hard in their centers.  Add the barley and salt and pepper to taste (better to add it here after you know how salty your bacon is).  Let simmer until the barley is cooked and starts to open up.

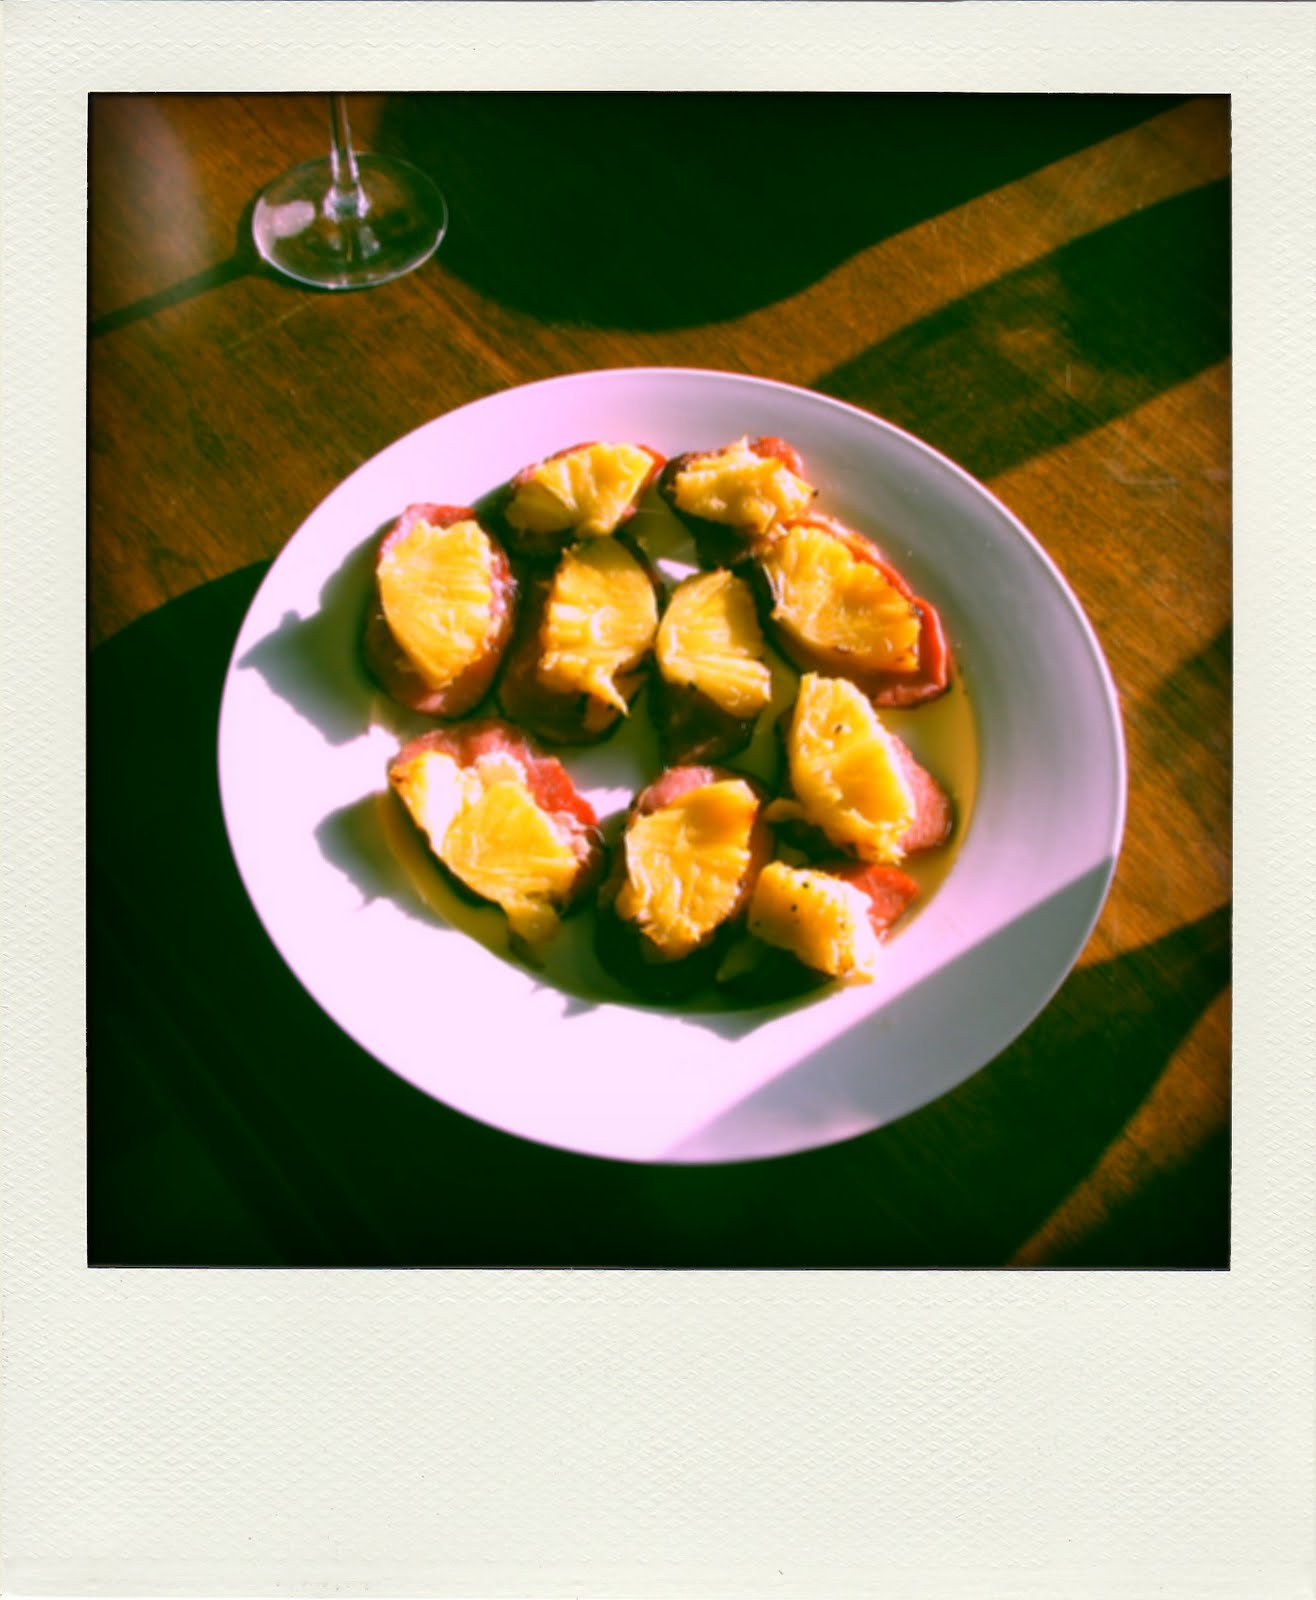
Back Bacon with Grilled Pineapple & Ginger
1 fresh Pineapple, ends and skins removed
2 slices Back Bacon per person
1 large tuber of Ginger, peeled, shaved

Section the pineapple length-wise into 4 even wedges and remove the core.  Grill over medium hot coals turning and checking regularly.  (The sugars can burn very quickly, but the juices may keep it from burning hardly at all.  Best to watch it closely until you know what you're dealing with.  If it does burn on one side, no worries; simply cut off the burnt stuff.)

When pineapple has been evenly roasted, remove to a cooler part of the grill and lay your bacon slices over the heat.  When sizzling on one side, flip the bacon and layer a thin shaving of ginger and a slice from one of your pineapple wedges.  When the bacon has become slightly crispy, remove from the heat and serve.

Chicken Roulade with Bacon Jam
2 boneless, skinless Chicken Breasts (per 4 people)
Bacon Jam
1/2 cup grated Swiss Cheese

Pound the chicken breasts out to a thin cutlet on a length of plastic wrap.  Spread the bacon jam and sprinkle the cheese evenly over the cutlet saving about 1 inch from one of the edges.  Starting at the edge opposite the naked edge, roll the cutlet toward the naked edge, firming the roulade as you go.  Wrap it tightly in the plastic wrap and refrigerate for a least a 1/2 hour or until the meat has firmed to the touch.  Remove from the plastic wrap, slice into 1 inch widths and cook in a skillet set to medium high, about 3-4 minutes per side.  Let cool, covered, for 5 minutes, then serve. 


Sauteed Kale with Walnuts
1 bunch of Kale, stems removed, rinsed, drained and coarsely chopped
2 tablespoons Bacon Fat
Salt and Pepper
1/2 cup Walnuts, chopped

In a very large skillet, melt the bacon fat.  Quickly add the kale--it WILL sizzle, pop and steam.  BE CAREFUL!  Using long handled tongs, toss the kale until evenly wilted and some bits turn crispy.  (The whole thing will be done in about 90 seconds to 3 minutes.  Don't walk away.)  Add the nuts, toss again, remove from the pan into your serving dish.  Keep warm until served.

Bacon Steak
1 slab of Belly Bacon
1/2 cup of Dark Brown Sugar
1/2 teaspoon Salt
2 tablespoons mild Red Chili Powder
1/2 teaspoon grated Lemon Zest

Preheat oven to 400 degrees.  Mix the sugar, salt, chili powder and lemon zest and combine thoroughly.  Place bacon steak onto a cooling rack in a baking pan, fat-side up.  Rub the chili mixture all over the fat side, covering uniformly. 

Bake for 45 minutes or until the chili rub is bubbling in the center of the steak.  (Internal temp of the steak should be about 165 degrees.)  Move to serving tray and carve at the dinner table for your guests!  (This tastes like the most wonderful and tender short ribs.  I loved it!)

Chocolate Chili Bacon Bars
16oz Chocolate Chips (I used Milk Chocolate for this batch)
6 strips of Bacon, crispy and crumbled to fine bits
3 tablespoons Chimayo Red Chili Powder (more or less to taste)
1/4 stick of Cinnamon, ground

In double boiler, melt the chocolate.  Stir in the bacon and chili. 

Pour out onto large piece of parchment paper, and spread even and about 1/4 inch high and a rectangular shape.  While still hot, shave or grind fresh cinnamon until the bar is well covered.

Let cool, score with a knife and break apart.  Store in the refrigerator for up to 4 days.

Sunday, January 10, 2010

What's for breakfast?

We're making Johnny Cakes this morning with bacon and eggs.

Basic Johnny Cake recipe:
1 1/2 cups Yellow Corn Meal
1 (light) teaspoon Salt
2 teaspoons Sugar
a pinch of Cayenne Pepper
2 1/4 cups Boiling Water
Butter or your favorite fat

Mix dry ingredients in a large bowl and whisk to combine. Carefully and quickly add the water, whisking the entire time to break up the lumps. Let the batter stand for 10 minutes.

Preheat a skillet to about 325 degrees (I love my electric skillet for this!) Melt a tablespoon of butter in the skillet. Drop in spoonfulls of the batter until the cakes are about 4 inches across and about a 1/4 inch high (or so). Cook for 6 minutes. Flip them over cook for another 6 min. They should be golden brown on both sides, crispy on the outside and tender (maybe even a bit mushy) inside.


We serve Johnny Cakes with maple syrup, but they go well with savory sauces as well. Or serve with porkchops during dinner.

Makes 8-10 cakes

For a variation, you can add diced jalapenos or corn kernels.


Oven Bacon

Place strips of bacon on a cookie cooling rack on a sheet pan. Make sure the sheet pan has at least 1/2 inch sides all the way around or you will have a smokey grease fire in your oven. I tried it, you won't like.

Put the pan in a cold oven and set the oven for 400 degrees. When the oven comes to temperature, start checking the bacon every few minutes, because the bacon will get burned in a heartbeat.

This is a great way to cook bacon because it eliminates splatters on the stovetop and each strip comes out straight and flat.

For a variation, try adding a thin sprinkle of brown sugar to the bacon before putting it in the oven!


We cooked everything in bacon fat this morning instead of butter--in part because we were out of butter and partly because bacon fat makes everything better.