Sunday, July 1, 2012

Can We Have a Grown-up Talk?

I love indulging my passions. A fly on the wall would be both shocked and amused at my antics. Spend more than a few hours with me and I bet you would be too. While I can maintain a professional attitude at work and I prefer not to swear in front of my mom, most social conventions get thrown out the window when I'm left to my own devices for too long. I similarly prefer to surround myself with people a lot like me, which also means that we become enablers, or even instigators, to each other. I have been witness to or participated in most of the wonderful vices known to modern man.

Which takes me to porn. Don't turn away! I'm not going to embarrass you, me or my mom in this conversation. (While I'd love to say that I'll actually make my mom proud with this post, that wouldn't exactly be accurate either. Probably.)

Pornography has been around for a long time. Frescos uncovered in the ancient city of Pompeii (buried under 20 feet of volcanic ash in AD 79) depicted graphic scenes of handsome men and beautiful women doing their best to illustrate the entire catalogue of The Birds and the Bees. Man/Woman, Men/Women, Man/Man, Woman/Woman and sometimes Man/Woman/Member of the Animal Kingdom. Pretty much everything there to view. Like a very educational Google search. Or late night Cinemax.
Like ancient Rome, porn is now going much more mainstream than it used to be, even a few decades ago. Do you know who Bree Olson is? If your first guess was Porn Star, then you are a guy and I know what you've been doing with your computer. If you answered, "Porn Star who famously hooked up with Charlie Sheen and that other woman during Charlie's near downfall, and then got even more famous by telling her part of the story to TMZ," you would also be right and have illustrated my point.

Do you know what Bree Olson isn't? She isn't real. Bree Olson isn't her real name. You can find her stats and dimensions; her turn ons and turn offs; what she thinks about the industry, Charlie Sheen, and religion. But you and I don't know what she's like in an arguement. We don't know how she cleans her house, how she cuddles up to a loved one when she's tired, nor the quirks she has about shopping. In short, we don't have a person. We have a porn starlet.

Pornography is a poor (albeit sexy) imitation of a relationship. It doesn't show the day-to-day events and activities that build a partnership. It doesn't show taking out the trash, changing the diapers or rubbing your beloved's feet. It only shows you . . . well . . . you know.

And THAT is why I hate the term "food porn." Example: While I love Neil Patrick Harris, and he has a great Twitter feed of beautiful food from famous restaurants from all over the world, (@NPHFoodPorn), the real beauty of the food he is enjoying is NOT in the picture of the dish, but in the making and sensuality of it.

Food porn doesn't show you the ingredients, challenges, efforts and triumphs of truly wonderful cuisine. The time it takes assemble disparate parts; the sweat in a hot kitchen; the sticky fingers; flour hanging in the air; the smell of soup-stock simmering on the stove. This where my relationship to food gets permanently fixed in my soul.
But here's the rub: I still love looking at pictures of food. The experience can be inspirational. There is a fantasy, a desire, a carnal wanting that makes you crave more. Yes, even though I hate the thought of food porn, I indulge in it, too. The preacher also sins.

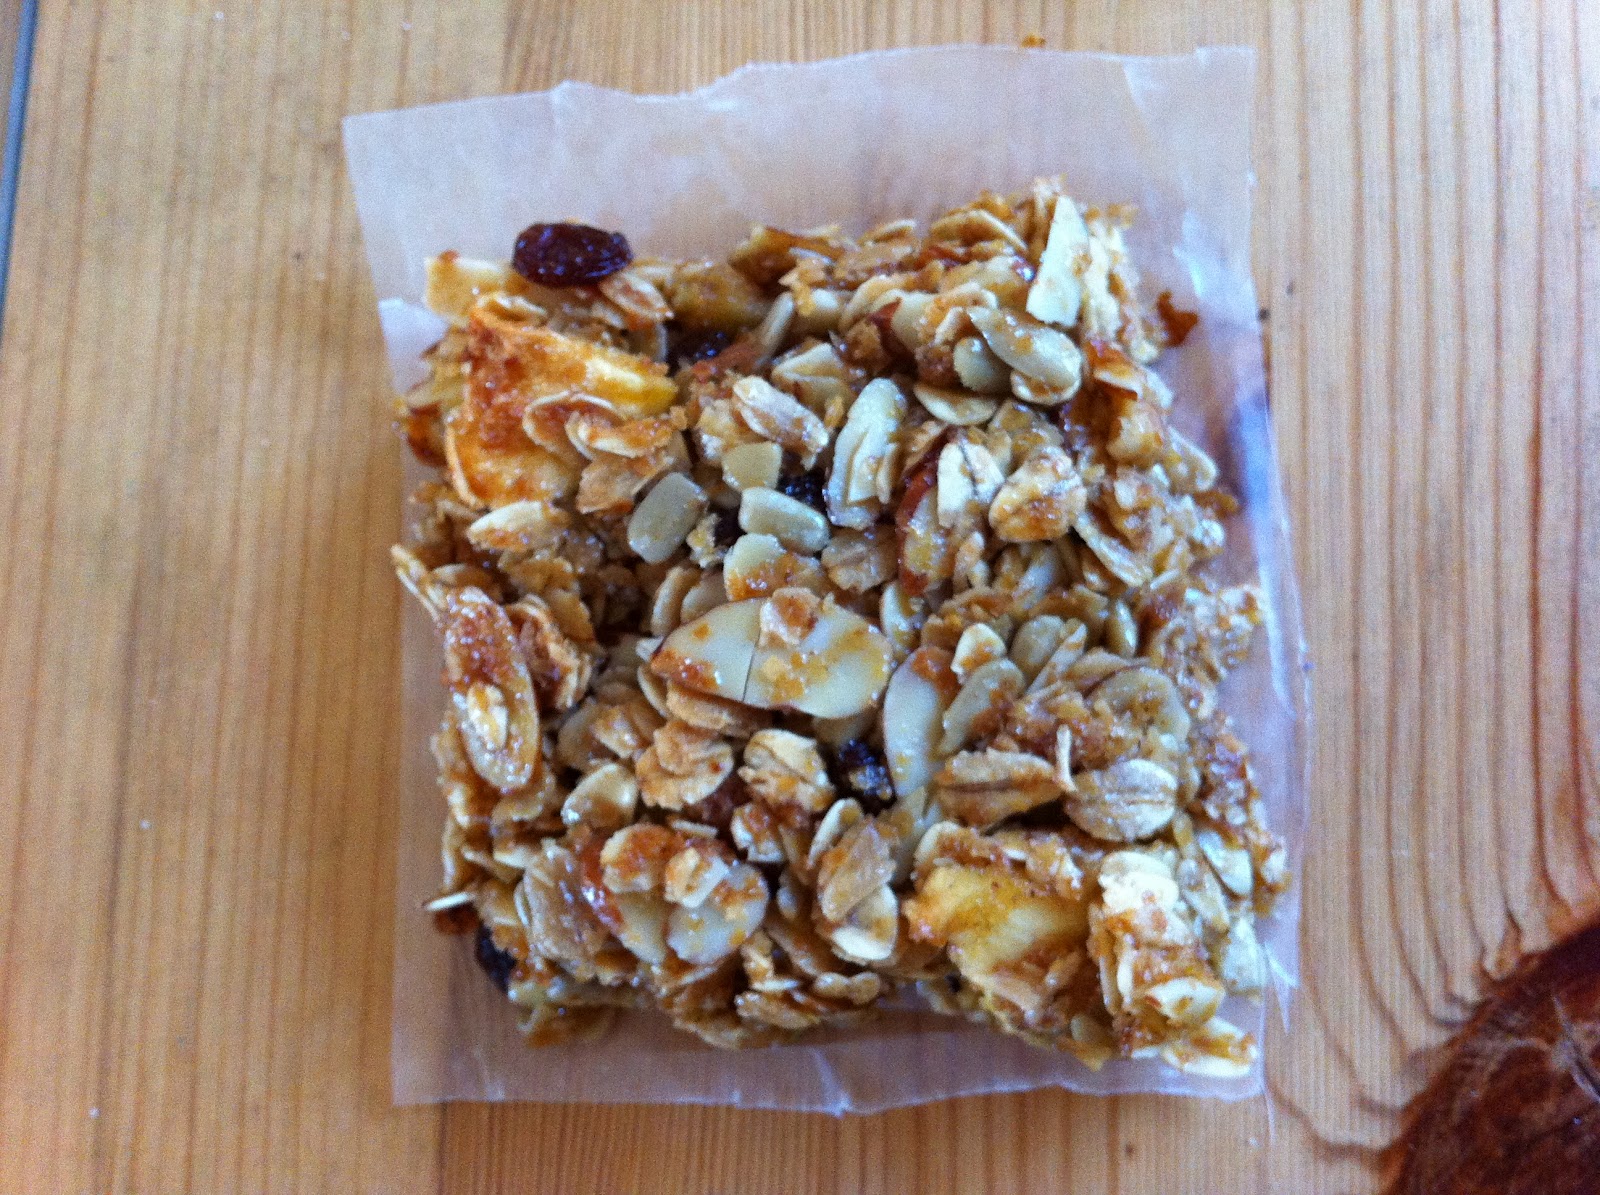
So here's a couple of recipes that could be food porn, but I am better for having had the relationship.

Gulkand 
Thank you to my friend at Indian Food Rocks for inspiring me and pointing me in the right direction. This particular recipe was adapted from recipes found extensively on the internet.
4-5 cups of aromatic Rose Petals (see recipe, below, to keep it safe)
2 cups White or Raw Sugar (I like more sugar than is usually suggested)
3 Cardamom Pods
2 teaspoons Coriander Seeds
4 Whole Cloves

Early in the morning, while your roses are just opening up for the day, snip the best-looking rose heads into a bowl. Make sure the roses are free of bruises, blemishes and BUGS! This is not part of my entymophagy post. Separate the petals from the rest of the rose head, and lay the petals out on a paper towel. Don't bother patting them dry but do remove any excess water. Discard any petals that are badly damaged, bruised, dried and crinkly, etc.

In a wide-mouth mason jar, layer rose petals and sugar. Somewhere in the middle, sprinkle in the spices. Finish with rose petals on top.

Seal the jar and place it in the sun for 6 hours a day for 3-4 weeks. Every other day, open the jar and give it a stir with the handle of a wooden spoon. (Opening the jar also allows you to indulge your senses by taking a whiff. I have to imagine this is what faerie farts smell like.) There will be condensation in the jars. This is good.

After 3-4 weeks, the petals break down and everything turns dark and muddy in color. This is also good. The sugar crystals melt and clump and pick up color and flavor.
You can eat the gulkand right off a spoon (Lord knows I do!) or you can add it to other ingredients. It combines well with alcohol. Mix a tablespoon of gulkand in 2 oz of water, 2 oz of good gin and 1 oz of vodka. Stir until the sugar has dissolved. Add the fresh juice of 1/2 lemon, shake over ice for 30 seconds and strain into a cocktail glass. refreshing on a summer night!


Orange Lavender Bitters
Like the bitters before, but MUCH better.
750ml Everclear
3 tablespoons Coriander Seeds
1 Anise Star
1 teaspoon Allspice Berries
2 teaspoons Peppercorns (I used white. That's what I had on hand.)
1 California Bay Leaf
8oz Dried Orange Peel
25 Drops Gentian Root Extract
8oz Dried Lavender Flowers

In a clean jar, combine all the dried ingredients EXCEPT for the lavender. Add the Everclear and the gentian root extract. Seal the jar and store in a cool, dark place for 7 days. Give it a good shake once a day. The liquid should start to turn orange.

After the first week has passed, add the lavender. Shake once a day for 7 more days.

Strain it through a seive to catch the big stuff, then double filter it through a pitcher water filter (I use a Brita).

When it is pretty clear (although very dark), put it in a sauce pan over medium low heat. Reduce it to 1/2. Store in clean jars.

Sunday, May 20, 2012

Breaking Bread

For it is we who must pray for our daily bread, and if He grants it to us, it is only through our labour, our skill and preparation.
--Paracelsus

Over the centuries, most of the world used some kind of bread product to enhance and suppliment their daily rations.  "Breaking bread" with another human being was a sign of welcome, acceptance and love.  Now this once noble food of tradition is under attack. 

Carbohydrate reduced diets have been quite the rage since before Atkins re-released his diet in 2002, and while I won't debate the merits of one diet over another, I will blanketly state that bread, pasta and rice have their place in any (weight-loss or other) diet.  They contribute to a feeling of satiety and provide easily accessible energy in the form of sugars.  Critics cite the "empty calories" of most high carbohydrate foods.  I'm not arguing this critique, but they taste so doggone good.  What's a glutton to do to satisfy his gluten cravings?

Make my own!

I like being able to control what I put in my body.  If I know the ingredients in my food, I can have a better handle on nutrients, flavors and eliminate other unwanted chemicals.  And not to get too self-righteous (a lie--I love to be self-righteous) but making my own also satisfies my soul.

The ingredients and recipes are simple, but bread and pasta both take time and a lot of elbow grease.  This naturally dissuades people from taking full advantage of the greatest joys to wash over your senses.  Even now I have dried dough under my fingernails and pressed into my cuticles.  Our house smells like heaven and my tummy gurgles with anticipation.

Tonight we feast on:

Artisan Bread
1 2/3 cup Warm Water (115 degrees)
2 teaspoons Yeast
1/2 teaspoon Sugar
4 1/2 cups Bread Flour, plus extra for kneading
2 teaspoons Salt
1/4 cup Olive Oil

In a large bowl, combine 1/3 cup warm water and 1/2 teaspoon yeast and the sugar.  Stir with a fork until dissolved.  Let stand for 10 minutes while foam forms.  Add 1/2 cup flour and mix until it comes together.  Flour your hands (and take off your rings) and knead the dough for a few minutes until it starts to provide some tension in your hands.  Cover with plastic wrap in the bowl and put it into a cold oven.  Let rise and ferment over night.

The next morning (or when you get to it), remove the plastic wrap and push the dough down.  Add the remaining warm water and yeast.  Using your hands, stir the dough in the water until it starts to break up in the water.

Add the remaining flour along with the salt and oil.  Mix, until it comes together, then start to knead.  It will be wet and sticky.  Cover and let it rest for 20 minutes.  Knead in the bowl until the dough starts to create some tension in your fingers (about 4 minutes).  Transfer the dough ball to a floured surface and knead until the dough holds it's shape and loses it's sticky feeling (about another 6 minutes).  Cover and let rise until it doubles in size.

Divide the dough into 2 equal parts.  On a floured surface flatten 1 piece of the dough to about 1 inch tall and about 6 inches wide and 10-12 inches long.  Fold in the sides to make a 12 inch loaf.  Turn the newly made loaf over onto a floured piece of parchment paper so the seam is down.  Prepare the other piece of dough the same way.  Cover and let rise for 30 minutes.

Preheat oven with a baking stone on the center rack and a cast iron (or other heavy metal oven-proof) skillet on the bottom rack to 425 degrees.

Dust the top of the loaves with flour.  Slide a silicone cutting mat or ridgeless cookie sheet under the parchment paper and transfer the loaves and paper onto the baking stone.  (Remove the transferring device.)  Put 1/2 cup ice cubes (or ice water) in the skillet.  Bake for 50 minutes.

Let the loaves cool on a cooling rack (remove the paper) for 20 minutes before cutting into the bread.  It will be hard but your patience will be rewarded.

Spinach Noodles
4-6 cups All Purpose Flour
1 teaspoon Salt
2 Eggs, beaten
1 tablespoon water
1/4 cup olive oil
2/3 cup Spinach, boiled and drained and chopped fine

In a very large bowl, mound up the flour.  Make a large depression in the mountain (think "blown out volcano"), large enough to pour in the other ingredients.

In a separate bowl, combine the salt, eggs, water, olive oil and spinach. Using a fork, mix well.  Slowly pour the wet ingredients into the flour depression and beat the wet ingredients with the fork.  You don't want to mix the wet stuff right into the flour, but rather beat the wet ingredients, so that it pulls the flour into the mix.  This gives you the best shot at getting the right ratios every time.  (Since every batch of flour is slightly different, some will absorb more and some less.)
As the liquid comes together as a dough, and the fork no longer seems to be your best method of stirring it up, start kneading the dough by hand, still in the flour.  You will incorporate a lot more flour now and the dough will start to tighten up.  Knead for about 4 minutes like this, then lift the dough ball out of the bowl and onto a lightly floured surface.  Knead for another 2-4 minutes until the ball starts to toughen up and becomes harder to knead.  Wrap in plastic wrap and let it rest for about 30 minutes.

Unwrap the ball and divide it into 4 equal parts.  Rewrap 3 of them.  On a floured surface, roll the dough out until it is about 1/8 inch tall.  I prefer to roll it out so that the dough is long and narrow--I like long noodles.

Using a straight edge and a knife or pizza cutter, cut the noodles into 1/4 inch wide strips.  Carefully lift them and hang them to dry.  (I used my mom's clothes line outside.)  Repeat with the other three balls of dough.
No straight edge for me!  I'm using a broken nut sliverer and free hand cutting.

Dry thoroughly to store for up to 2 months in a sealed container (cool, dry, dark place, of course).  When cooking, heat a large pot (6 quart) of water to boiling.  Add a teaspoon of salt, and a goodly amount of noodles.  Let them boil 3-5 minutes, drain and stir in a couple tablespoons of sauce or olive oil to keep them from sticking.

Sunday, April 15, 2012

Dessert on a Diet

The Quest: Make a dessert high in nutritional value, that tastes great and is relatively low in calories.  Bonus: Vegan (I want EVERYONE to be able to enjoy this.)
Double Bonus: The cooking time is less than a half hour, although the refrigeration is 4 hours.
The Experiment:  A different kind of Panna Cotta.

Back Story: Everyone will recognize that I've had no professional training for cooking.  Almost everything I've learned I picked up from my parents, reading cook books, watching TV and videos and lots of trial and error.  You also know that I've been on a bit of a health kick of late.  I want to look and feel better all of the time.  But I'm still a glutton at heart.  I love sweet, salty, rich and creamy foods.  How can a glutton have everything he wants?

This is my problem.  I can't read this.
Neither can you.  So, don't judge me.
The Players: Panna cotta is a milk-based dessert set using animal-based gelatin.  Neither of these things are allowed in a vegan diet.  What can be substituted for whole milk?  Nothing really, but I tried both unsweetened soy milk and plain almond milk.  I liked the taste of almond better.  It also has less fat (good for me, bad for dessert), less calories and more nutrition than soy.  Even more challenging, I need to find a substitute for heavy cream.  I selected canned, unsweetened coconut milk.  It has a relatively high fat content (although nowhere near real cream), is naturally sweet and rich. To set the gel, I looked for plant substitutes.  Agar (or agar agar) is a structural agent found in the cell walls of red algae.  I found it in the baking aisle of my local grocery store, in thread and powdered form.  (Like the adventuresome idiot I sometimes am, I got my agar agar from the Pacific Ocean Marketplace years ago before I knew what it was or how to use it.  It's been sitting in our pantry for at least 5 years.)

The cast of characters.
If I stopped here, the panna cotta would taste ok, but not great.  The really rich creaminess just can't be brought to life without richer and creamier ingredients.  Therefore, I decided to go in a different direction.  I added a can of pumpkin puree and 2 tablespoons of grated fresh ginger to really punch up the "wow" factor.  The resulting mix has only 94 calories, 110% daily requirement of vitamin A, 10% daily requirement of vitamin C, is high in dietary fiber, calcium and iron, has 0 cholesterol, and only 4 grams of fat.  And it tastes GREAT!

The resulting panna cotta?  A failure the first time around.  It didn't gel.  That was a fear of mine with so little fat.

The next try?  Stay tuned.

Tonight for dessert, we're having:

Vegan Pumpkin Ginger Panna Cotta Ice Cream
1 cup Almond Milk
2 tablespoons Agar Agar Threads
1 can (15oz) Pumpkin Puree
2 tablespoon grated fresh Ginger
2 cups Coconut Milk
1 teaspoon Vanilla Extract
6 tablespoons Sugar
pinch of Salt

Pour the almond milk into a medium sauce pan and sprinkle the agar evenly over the surface of the milk. Let stand for 10 minutes to allow the agar to hydrate. Get the rest of your ingredients ready and also fill a very large mixing bowl 1/2 way with ice and add enough water to let the ice cubes float off the bottom. Get another bowl ready that is small enough to fit inside the large bowl, and large enough to hold about 6-8 cups of liquid. Also set out the ramekins or cups you will use for chilling.

Heat the almond milk and agar on medium heat, stirring constantly, until the agar dissolves completely and the temperature reaches 135 degrees on an instant read thermometer. Remove from the heat and stir in the sugar and salt until dissolved.

Pour the almond milk mixture, the coconut milk, pumpkin, ginger and the vanilla into the smaller of the two bowls and place that bowl into the ice water bath. Stirring constantly, chill the mixture to 50 degrees.

Pour the finished mixture into the cups, cover with plastic wrap and refrigerate for 4 hours.

To serve, dip the cup into hot water for 15-20 seconds, making sure not to let any water spill into the panna cotta. Wet your finger and gently run it around the edge of the cup loosening the panna cotta's hold. Turn out onto a serving plate and top with your favorite syrup, sauce, fruit, nuts, etc.

Pour all the ingredients into the ice cream mixer.  Add 6 more tablespoons sugar and 1 teaspoon of ground cinnamon.  Mix and chill according to the mixer's instructions.  Freeze for a bit longer.  Serve 2 scoops in a bowl or on a cone.  Contemplate another solution to the panna cotta dilema.

Sunday, March 18, 2012

Another Colorado Spring Break

Question: What do you do when you run out of milk but still want pancakes?  Milk is somewhat integral to the whole holding-a-pancake-together principle. 

Follow-up question: It's a warm spring morning and you want something to remind you of the high school Spring Break you never took took to Hawaii because your parents didn't have the money to go globe trotting, even though the cool kids would metaporically rub your nose in their glorious golden tans when everyone got back from the week off, and you secretly imagined rubbing coconut-scented suntanning lotion on Becky's back, but as soon as you thought these things you had to lock yourself in the bathroom stall and think about baseball until certain physical traits dissipated.  (OK, that's not a question.)

Answer:

Tropical Pancakes
1 cup All Purpose Flour
1/2 teaspoon Baking Soda
2 teaspoon Baking Powder
1/2 teaspoon Salt
2 tablespoons Sugar
3/4 cup Coconut, toasted to golden brown
1 Honey Mango, peeled and pitted
1 Banana
2 teaspoons fresh Ginger, grated
1/2 cup Orange Juice
1 Egg, beaten
2 tablespoons Vegetable Oil

In a large mixing bowl, combine the dry ingredients and whisk together until well combined.  In another bowl, mash the mango and banana together.  Add the ginger, OJ, egg and vegetable oil and mix until it's a homogeneous soup. 

Stirring with a silicone spatula, add the liquid ingredients to the dry.  Stir until combined. 

Heat a skillet (or two) to medium high on the stove top.  Spray with cooking spray.  When hot, add about 1/2 cup of the batter to the skillet.  Reduce the heat to medium.  Cook on that side until the bottom is evenly browned.  Flip over and cook until the other side is done and the center is cooked through. 

Repeat with the rest of the batter. 

Keep them warm in a 100 degree oven.  Serve with sliced fruit and syrup. 

Saturday, March 3, 2012

I Have No Idea What to Call This One

This is the best name for this dish I could think of, so far. 

Hide the Sausage
1 boneless Pork Loin Roast (about 2 1/2 lbs)
4 Bratwurst Sausages
1 Onion, sliced
2 tablespoons Butter
1 bottle Cheap Beer (do NOT use a lite beer--you'll just embarrass yourself)
Salt and Pepper
2 more tablespoons Butter
2 tablespoons AP Flour
1 sheet Puff Pastry

Make the bratwurst, beer, butter and onions according to this recipe

Lay the loin fat-side down on a cutting mat.  Using a long knife, start a cut about an inch and a half from the top edge of the loin and continue cutting parallel to the cutting mat.  When you get about an inch and a half away from the edge of the loin, unfold that flap and turn the knife to slice toward the mat. When you get about an inch and a half from the next edge of the loin, continue to unfold and slice.  You ulimately want to unroll the entire loin into an inch and a half thick scroll.  Season with salt and pepper. 

In a large skillet, melt the remaining butter over medium high heat.  When completely melted, sprinkle in the flour and whisk.  Keep whisking/stirring until the roux starts to darken but before it turns a deep brown.  Remove the brats and onions from the beer bath and pour the golden liquid into the roux, whisking thouroughly and constantly.  When the sauce has thickened to a very thick gravy, remove from the heat.  Let it cool for 10 minutes. 

Spread about 1/2 of the gravy evenly in the center of the unrolled loin, stopping about one and a half inches from the edges. Lay the brats latterally 2x2 and end to end at what was the center-most part of the loin (the part that will be the center when you start re-rolling the loin).  Add the onions on top of the brats.

Roll the loin back up.  You can try tying it, but honestly, everything is going to goo out.  Instead, I wrapped the whole thing tightly in two layers of aluminum foil.  Place the package on the hot part of the grill.  Close the lid and cook for 10 minutes.  Turn the package over and cook the other side for about 8 minutes. 

The loin will now hold it's shape but the goo inside will come pouring out, so I unwrapped the top of the loin and left the bottom still sit in foil.  I moved the loin to the cool part of the grill, added cherry wood to the coals and then closed the lid to smoke for about 20 minutes. 

Bring the loin in and let it rest for 10 minutes.

Preheat the oven to 425 degrees. 

Roll the puff pastry out into a sheet large enough to wrap the loin.  Place the loin, smoke-side down on the center of the pastry and wrap it up, sealing the seam on the bottom.  Trim away the excess dough from the ends.  Flip the package over and lay it in the center of a parchment paper-lined cookie sheet.  Poke a lot of little holes in the top of the pastry to let the steam out and pop it into the oven. 

Cook for 15 minutes or until the crust is golden brown.  The interior temperature will read about 170 degrees.  Let rest for 10 minutes.  Slice and serve!

I know the name implied a post more hilarious.  Sorry to let you down. 

Penis. 

Does that make up for it?

Sunday, February 26, 2012

Planning to Lose

The Diet continues.  As mentioned in my Facebook page, I'm down 17 pounds from the beginning of the year (with a few side effects--the benefits of a more vegetable-based diet).  That's the easy weight, however.  The real challenge begins now.

This is good.  I'm establishing the habits of awareness and am far more cogniscent of what I put into my body.  I've always taken pride in cooking from scratch and using whole foods as much as possible, but now I also look at quantity and diversity of what I eat.  Whereas, in my previous diet, I would eat all of the whole grains (quality carbs) and proteins (primarily lean meats) I wanted, now I eat a tremendous quantity of leafy greens.  Kale is my new BFF.  Lentils, other legumes and beans provide complex carbs, proteins and iron.

My plate and my biological functions have become more colorful.

Now I'm adding exercise.  Like budgeting for money or calories, budgeting time is also a challenge.  The question of how to spend a limited resource forces one to cut back in some areas to make room for something new.  Unlike money or calories, however, additional time cannot be created.  (You can take on another job or work extra hours for more money.  Exercising burns calories that are then available for extra gluttony.)  The time budget is therefore essential.

One thought: multitasking.  I am essentially a lazy person who loves his leisure time.  I'm not a huge TV watcher, but I love movies.  I can easily combine many calesthetics and simple weight training with movie watching time.  I am walking my dog a little more than 3 miles during lunch. (Added bonus: I eat less during lunch and have smaller healthy snacks throughout the day.)

Overall, however, I think I will have to make some time for concentrated, focused exercise.  30 minutes a day?  45 minutes?  I'm not sure yet.  I'll keep you posted.

For snacks, try these nutritional delights:

Baked Kale Chips
This is an adaptation of a recipe suggested to me by a very good friend.  Thank you SO MUCH.  I love this. 
zest and juice of one Lime
Salt (I prefer Table Salt, here)
2 tablespoons Olive Oil
1 bunch of Kale

Preheat oven to 350 degrees.  Line a cookie with parchment paper.

Seperate the leaves from the coarse and fiberous, stem-like midrib.  Tear the leaves into bite-sized pieces.  Wash and use a salad spinner to dry.  Toss with olive oil (a little goes a long way--2 tablespoons works well), zest and sqeeze of 1/2 of a lime (a whole lime maybe needed if it's not very juicy).

Lay the leaves out flat on the cookie sheet.  Be sure they don't overlap much.  Sprinkle lightly with salt.

Bake for 10-13 minutes, or until dried and crispy.

These will keep in a well sealed container in a cool location for up to a week.  You'll eat them in an afteroon.


Granola Bars
These are delicious, easy and cheap.  You can vary the ingredients to your heart's desire. 
3 cups Rolled Oats
1/2 cup Sliced Almonds
1/2 cup Raisins
1/2 cup Dried Apples, diced
1/2 cup Dried Banana Chips, crumbled
1/2 cup Sunflower Seeds
1/2 cup Wheat Germ
1 cup Honey
1/2 cup Brown Sugar
1 teaspoon Salt
3 tablespoons Unsalted Butter, Margarine or Vegetable Oil (or a combination)
2 teaspoons Vanilla Extract

Preheat the oven to 350 degrees.

Spread the oats, almonds, sunflower seeds and wheat germ evenly on a cookie sheet.  Bake for 15-20 minutes until arromatic and toasted.  (Stir occassionally to keep from burning.)

While the dry ingredients are toasting, heat the butter, salt, honey and brown sugar on medium high heat until it starts to bubble.  Then reduce the heat to a simmer.  Again, stir.  This time constantly until the brown sugar is completely melted.  Remove from the heat and stir in the vanilla.

Spray a 9x13 baking pan with cooking spray.  Reduce the oven temperature to 300 degrees.

In a large bowl, combine wet ingredients into the dry ingredients.  Stir until well combined.  Pour the mix out into the baking pan.  Using the back of wooden spoon or a heavy flat spatula, press the mixture as flat in the pan as possible.  It needs to be densly packed to hold together.

Bake for 25 minutes.  Remove from the oven and let cool for 15 minutes.  Cut into sections (I got 15 pieces).  Let cool some more, then remove from the pan, separate the pieces from each other and place on waxed paper.  After an hour or so, wrap in waxed paper for individual treats and place in a cool dry place for up to a week.

They make a great breakfast treat or quick snack.


Fruit and Nut Pizza
I tend to have pizza dough on hand. It keeps in the refridgerator for a while, but it tends to ferment--like sourdough.  Use what you need and keep the rest for later.  Just let it come (mostly) to room temperature before using it. 
Pizza Dough
4 1/4 cups Bread Flour, plus extra for kneading
1 teaspoon Salt
2 packages Yeast
2 tablespoons Brown Sugar
1 1/2 cups Warm Water (think bath temperature)
1/4 cup Olive Oil

Filling
1 tablespoon Raisins
1 tablespoon Sunflower Seeds
2 teaspoons Wheat Germ
1 teaspoon Kasha (roasted and cracked buckwheat)

Toppings
Honey
Cinnamon and Sugar
sliced Apple (Granny Smith)
sliced Banana
sliced Almonds

To make the dough: stir the yeast and brown sugar into the water until disolved.  Let it foam up (about 10 minutes).  Combine the flour and salt in a stand mixer with a dough hook.  Start on the lowest speed and pour in the wet ingredients.  Mix until it comes together in a ball.  Turn out onto a floured counter and knead.  Place in a warm, still location and let rise for an hour (or until doubled in volume).  Punch down.

(If you've been refridgerating the dough, let the dough warm up and start from here.)

Preheat the oven to 400 degrees.

Tear off a hunk of dough about the size of the palm of your hand. That's good for 1 person.  Flour the counter top and spread the dough out from the center until it's rather flat.  Sprinkle the fillings into the center and knead.  The fillings will fall out and push through.  It's ok.  Keep kneading and incorporating what falls out.  Using a rolling pin, roll the dough out turning and flipping to try and keep a round shape.  Transfer to a dusted silicone cutting mat.  Dock the dough (poking it all over with a fork) to keep it from poofing up too much.

Sprinkle liberally with cinnamon and sugar.  Arange the apple, banana and almonds.  Drizzle with a little honey and sprinkle with a little more cinnamon and sugar.

I use a pizza stone, but if don't have one, use a cookie sheet.  Transfer the pizza to either the stone or the cookie sheet and bake for 12-15 minutes. 

Sunday, February 5, 2012

Are You Ready for Some Over-Eating?

It's that time again.  Two teams take the field.  One will emerge the victor; the other....

Honestly, I'm indifferent to the teams involved, but the ritual is wonderful.  People all over the country get together and enjoy the most glorious exhibition of television advertising and gastronomic over-indulgence.  This is the most American of all celebrations!  That is the part I love.

I've recounted the legend of our previous game day adventures to a land so distant (we have to drive for more than an hour, so that makes it distant in Colorado) and a home so wonderful (it truly is a lovely home with beautiful hosts) and all of the bounty laid before us (e.g., lobster, crab legs, mannicotti, key lime pies, flowing beverages, and dozens of snacks) that a Roman Saturnalia would pale in comparrison!  I am certain this year will be no exception, I will offer a recap soon.

(For those of you concerned about my diet, I enter into today guilt-free.  I will try not to over indugle, but rather I will enjoy to my heart's contentment.  Then I will return happily to my life of watched calories and extra exercise.  Besides, I am still a glutton at heart.)

I also accept this day and this party as a challenge.  I like to push the boundaries of what I've done before and create something bold.  To that end, I present to you:

Mac and Cheese Bites
3/4 cup shredded Gouda
3/4 cup shredded Sharp White Cheddar
3/4 cup shredded Fontina
1 14oz bottle of Guinness (less a sip)
1 cup Milk
1/4 cup Butter
1/2 teaspoon Salt
4 tablespoons Flour
8 pieces of Bacon, cooked and crumbled
12 oz of Shell Macaroni, cooked and drained
many Won Ton Wrappers
Canola Oil for frying
Egg wash

Preheat the oven to 350 degrees.

Melt the butter in a sauce pan.  Over a low heat, stir in the flour and salt to make a roux--a thick paste.  Stir in the Guinness and the milk.  Stir in the cheese, a 1/2 of a cup at a time, allowing it to melt completely before adding the next next 1/2 cup.  The sauce will continue to thicken.

Stir in the bacon bits and the macaroni.

Pour the mac and cheese into a casserole dish and bake for 30 minutes.  Allow the casserole to cool completely.

Heat oil to 375 degrees in a large Dutch oven or fryer.

This next part is best when you do it with a friend.  Taking 1 spoonful at a time, center on a won ton skin.  Brush the edges with an egg wash and seal.

Place no more than 4 or 5 won tons in at a time or the oil will cool too much and the food become greasy.  Cook until golden brown on all sides.  Let drain on an elevated rack.

To rewarm, place in a 250 degree oven for 15 minutes.

This recipe makes a somewhat bitter mac and cheese.  You can change the cheeses to something sweeter, or you can compliment with great sauces.  I am going to serve warm with dipping sauces.

Sunday, January 29, 2012

Reflections and Diminishing Returns

I was on the radio this past Friday.  It's always funny to hear how I sound when I hear my voice played back to me.  I get very self-conscious.  I can hardly sit still.  So while I was listening to the broadcast, my mind started to wander and I got to thinking about how we (people) view ourselves.  What creature of even moderate intelligence isn't fascinated by its own reflection?  Humans, even more so.

I considered what has shaped my opinion of my self.  Every story that I have created of every event of my life, however important or trivial has lead to the person I am today.  Every choice I have ever made leads me to where I am now.  Mom and Dad, my brothers, my wife, every girlfriend I've ever had, peer pressure from friends and frenemies, every mistake and every success are filtered, magnified, diminished, remembered and manipulated by my mind to create this persona.  I'm amazed at my own success of who I am, because of and in spite of, my own mind.

Pretty heavy so far?  You're doing this, too.

So I guess what this really means is that I, and I'll include you in this, too, so I'll say "we," are still making choices today that will lead to choices we get to make tomorrow.  I pretty much like me, but there is one thing that has been looming over my head: my health and physique.  I want to trim down a little.  Therefore, I am endeavouring to make slightly better choices today: I'm going on a "diet."

This is me. 
This is what I look like.
I announced this to a few people and everyone has asked, "why?"  You all flatter me.  Remember in my last blog post how I said I want to be able to do pull-ups again?  A lighter me will help with that.  Also, I have clothes I like that I would wear if I could breathe while wearing them.  But mostly, I am convinced that WiiFit is making fun of me.  My on-screen avatar (my Mii) is shaped like a watermelon.  Curse you, Wii!  Who knew that the manufacturers of the WiiFit program can do what doctors could not--elicit change--just by making my cartoon body as wide as my cartoon head.  I want a cartoon head that is twice as big as my body!

How to create a successful diet, though?  I've written before on why diets fail, and came to the short conclusion that the foods we have grown accustomed to eating have programmed our bodies and minds to crave those foods.  Naturally, reprogramming my mind will overcome those cravings and I will be wildly successful.  HA!  If only it were so easy.

With the help of a friend, I found an iPhone app that allows me to track every bite I put into my fat yapper.  It calculates my goals and sets my daily calorie limits.  My limit is 1497 calories per day.  This means that I SHOULD lose 1.5 pounds per week and in 20 weeks (or near my birthday) I should be at my target weight.  (I'll let you do the math.  Yes.  I'm overweight. We wouldn't be having this conversation if I were already at my ideal weight.)  One week down and tracking what I am putting into my body and the calories I expend in exercise, I have gained 1 pound.  Cousin Boinker!!  (I'm also trying to swear less. I'm trying different not-quite-swear combinations that will let me think about what I'm saying and maybe laugh at myself instead of get angry.  It's still meeting with mixed success.)

I won't abandon this goal and program, however.  At least not yet.  I'll stay under my calorie count and will try to keep my activity level up.  I will keep you posted every now and then to let you know my progress.  Anyone who wants to join me can by going to MyFitnessPal.com or loading MyFitnessPal on their app-enabled device.  And, of course I will provide some good recipes to help us along this path.

For dinner tonight, try this low fat, low calorie dinner:

Poached Shrimp With Ginger and Bamboo Shoots
16 large Shrimp (22-26 count), in shell, headless and de-veined
1/2 teaspoon Red Curry Paste
1/4 cup dry White Wine
1/2 cup Water
1 Bay Leaf
8 Allspice Berries
10-12 whole Black Peppercorns
1 small Shallot, minced
1 large clove Garlic, minced
1 tablespoon fresh grated Ginger
pinch of Salt
2 tablespoons Rice Wine Vinegar
1 10oz can of sliced Bamboo Shoots, drained

In a 10" skillet, heat the curry paste, water and wine to a slow boil, stirring until the paste dissolves.  Add in the shrimp, bay leaf, allspice, peppercorns, shallot, garlic ginger and salt.  Stir once and cover.  Reduce the heat to a simmer and cook until the shrimp are pink.  (Flip the shrimp midway through to cook evenly.)

Remove the allspice and peppercorns (as best as you can).

Add the vinegar and bamboo shoots.  Return to a simmer. 
Serves 2; about 120 calories per person.

Sunday, January 22, 2012

Honestly, This Isn't a Midlife Crisis

I wrote my "bucket list" when I was 15, but the movie hadn't been made yet, so I called it my "list of things to do before I die."  Some things I wanted at 15, I don't want anymore.  I don't want to be a famous actor in the movies: I really don't like people enough to appreciate all the fans I would have.  I also don't want my own island: No one needs their own island and although I don't like the crush of humanity every day, I would get lonely.  Some things on the list I probably won't ever accomplish because technology and my own motivation won't allow for it.  For example, I probably won't be walking on the moon.  And some of those joys on the list I accomplished quickly, some took a little longer, and some are still going to come true.  I eat fire.  I learned Spanish, French and Chinese languages (although I'm very rusty in speaking any of them now).  I am a chef--at least in my own way. 

I have realized recently, however, that I have many more things in my life to do.  Therefore, I have started a new list:

MY NEW LIST OF SOMEDAY AWESOME ACCOMPLISHMENTS

Travel is on the list.  I want to visit each continent, and except for Antarctica, I want to meet the local folk in the smaller towns.  I want to taste their cuisine and know the regional comfort foods.  (In Antarctica, I want to see the Emperor Penguin from a safe enough distance to not disturb Morgan Freeman.) 

I want to be able to do chin-ups again.  Without assistance.

I'm learning to pick locks.  Since I regularly lock myself out of things with locks, this should be immensely useful to me. 

I've become an ordained minister so I think it would be grand to perform a wedding ceremony.  And maybe a funeral.  Or an exorcism. 

I will have a secret identity and post Urban Exploration adventures under that alias. 

I will accept more dares, but only if there is a greater chance of the dare resulting in fun for me rather than tragedy.  Unless the tragedy also is likely to be fun, then it's Game On!

I will have my own television show.  (Crap.  Now I have to get prepared to have hoards of fans, again.)

If I ever give up being a financial advisor, I will be a butcher.  Or a bounty hunter.  (Picking locks and speaking foreign languages should come in handy.)  (Wait.  I meant, "Probably handier for bounty hunting."  I don't know if animals speak Spanish, French or Chinese.  And since most of them don't have opposable thumbs, I don't think they are negotiating keys too well.)

I want a pencil thin moustache.

I still want to go to outer space.  Richard Branson should be able to help me out. 

And I think I need to be less bashful when it comes to trying new foods.  I really need to get out of my rut.

With that in mind,  here's a fun little recipe.

Poached Baby Octopus for Dessert
1 1/2 cups Port
1/4 cup Sugar
12 Baby Octopus (5" tentacle diameter)
Sugar and Cinnamon mixture (2:1 ratio Sugar to Cinnamon, shaken together in a jar)

If they aren't already, have your local fish monger clean the octopus and remove the beaks.  Rinse them thoroughly.  Heat a large pot of water (6 quarts) to boiling.  Add the octopus and let simmer for 10 minutes.  Drain and put the octopus into an ice water bath to stop them from cooking.  
When the octopus have chilled, rub them gently under running water to remove the outer skins.  Don't worry if you can't get all the skin off--just get most of it. 
In an electric skillet (so much easier to control the temperature), heat the port and sugar until it boils and the sugar dissolves.  Reduce to a simmer and add the octopus.  Cover and simmer on the lowest setting for 2-3 hours, turning them over every now and then to cover all sides evenly.  Yes, they turn slightly rubbery, but that is what octopus is made of: God's old inner tubes.  And yes, the port turns the octopus purple, but that's a natural color for them.  The flavor changes to something wonderful, however.  Magical, even. 
When you are getting close to eating, remove them from the port and let drain.  Place them in a large bowl and sprinkle the octopus with cinnamon and sugar, tossing to coat them evenly.   Serve with fresh sliced strawberries and a scoop of French vanilla ice cream.